Creating Halftone with Paint Shop Pro 8
Tools:
Paint Shop Pro 8
Halftone is a popular effect used in graphics ranging from amateur CGs to professional advertisements. Although there are a slew of tutorials on the subject specifically for Phtoshop users, Paint Shop Pro is rather neglected! Luckily, the effect is easily achieved with PSP. To begin, open a new image, create two layers, then fill the top layer with white. On this same layer, create whatever shape you'd like with a black brush:
Go to Adjust > Blur > Gaussian Blur, and blur as much as you like. Essentially, more bluriness = more dots in the final product. Here, I used a radius of 7 pixels.

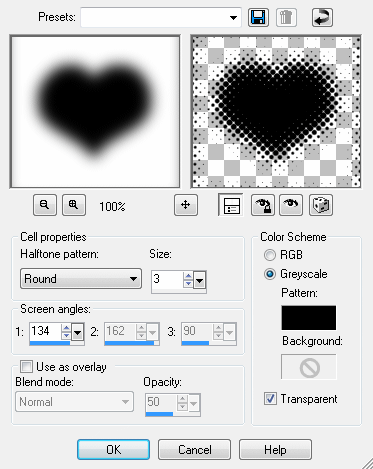
Here's where halftone comes in. Go to Effects > Artistic Effects > Halftone. Make sure Round, Greyscale, and Transparent are selected. Make sure Use as overlay is not.
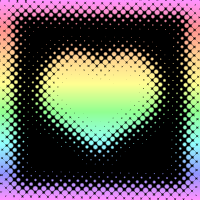
Simple as that! Because the white is now transparent, you can lock the transparency on that layer and fill the halftone with another color, a gradient, a pattern, etc. I used a rainbow gradient (below). Although round halftone is pretty ubiquitous, various halftone effects can be achieved by playing around with the options in the Halftone dialog box -- have fun experimenting!